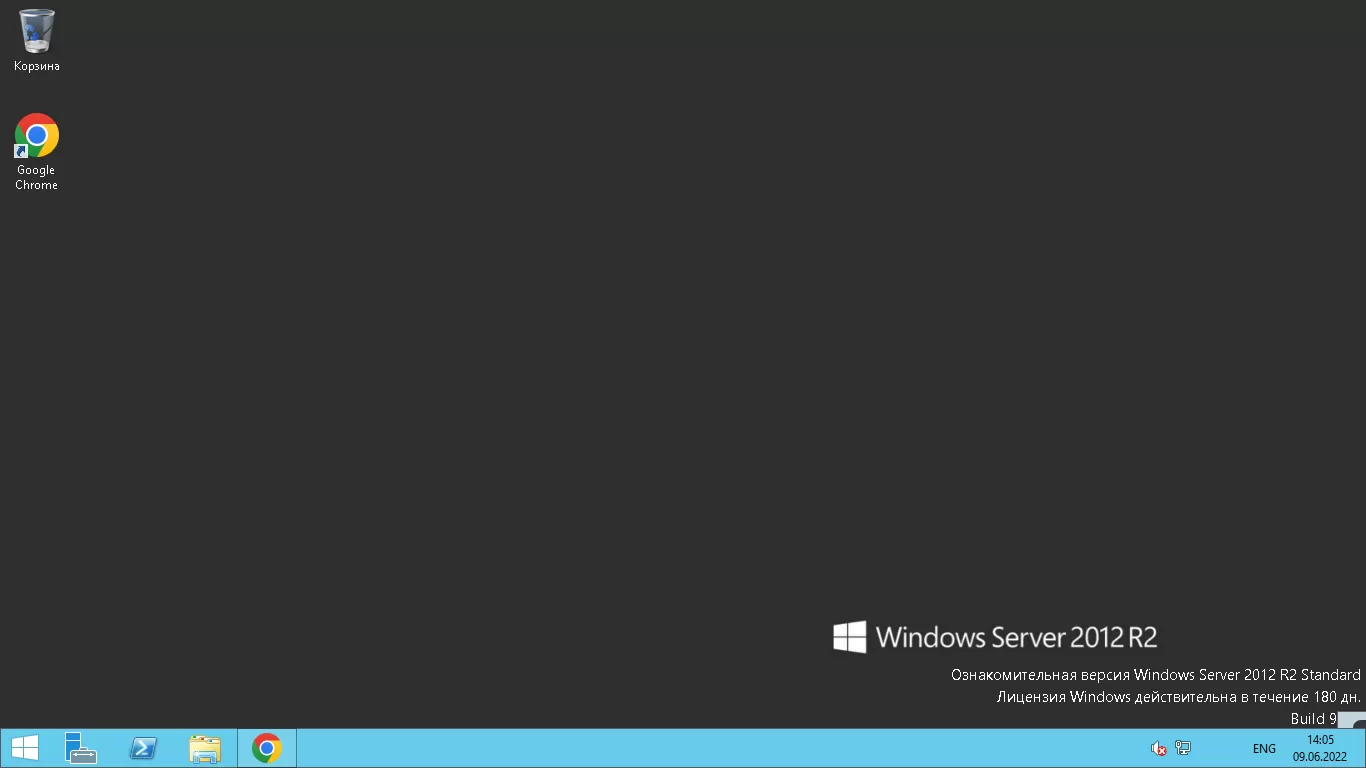
VDS (or dedicated server) is a computer on the Internet that works 24/7 . There are several advantages of such a computer:
1) It does not take up physical space, that is, it does not stand in your room and does not get in the way under your feet.
2) It works around the clock and you can use it at any time!
3) You do not have to pay for the light for its use.
4) It can be used from a phone or tablet.
Imagine that you have a program that needs to run around the clock . Of course, you can put it on your home computer and not turn it off. But, the solution is so-so ... Or you don’t have a PC at all, but there is a desire to use this very program.
For these needs, there is VDS - a computer on the Internet that works around the clock. And on which you can install any program that should work even during the day, even at night. It doesn't matter where you are: at home, on a walk, at work...
1) First, go to the site that provides Dedicated Server services and register by entering your mail and password
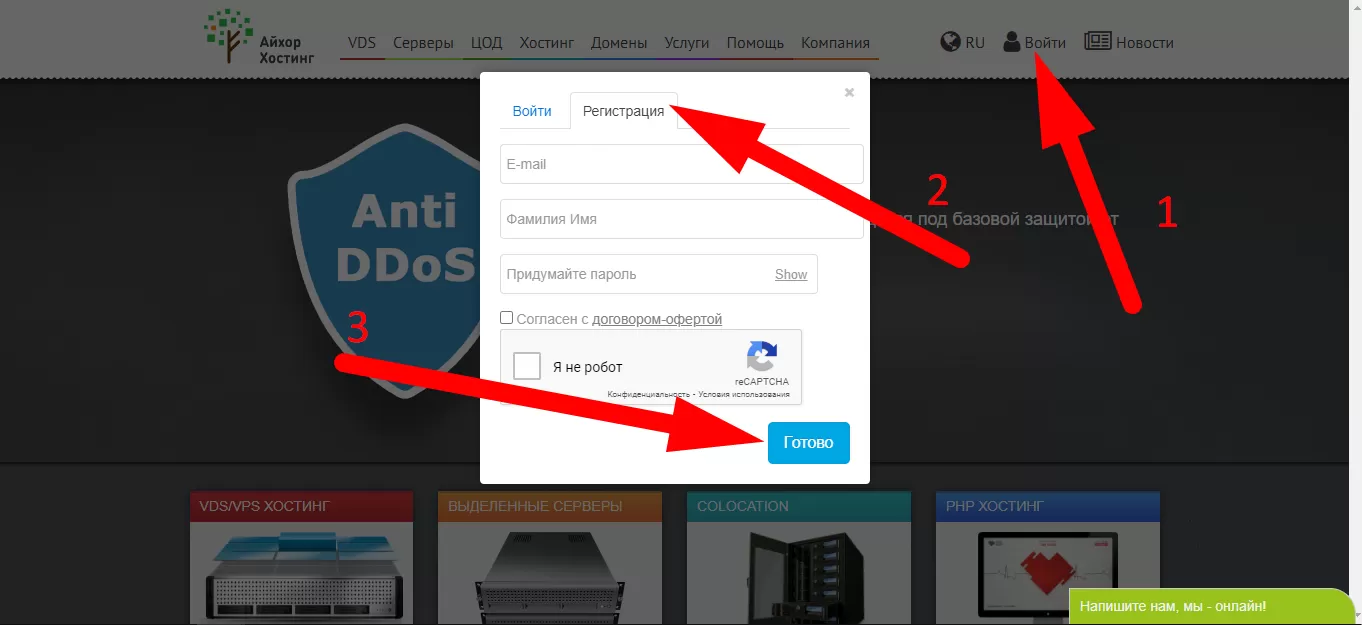
2) Enter the site using your registration data
3) Now we need to top up the balance by at least 400 rubles (this is how much the cheapest dedicated server costs per month)
To do this, click on " Top up balance "
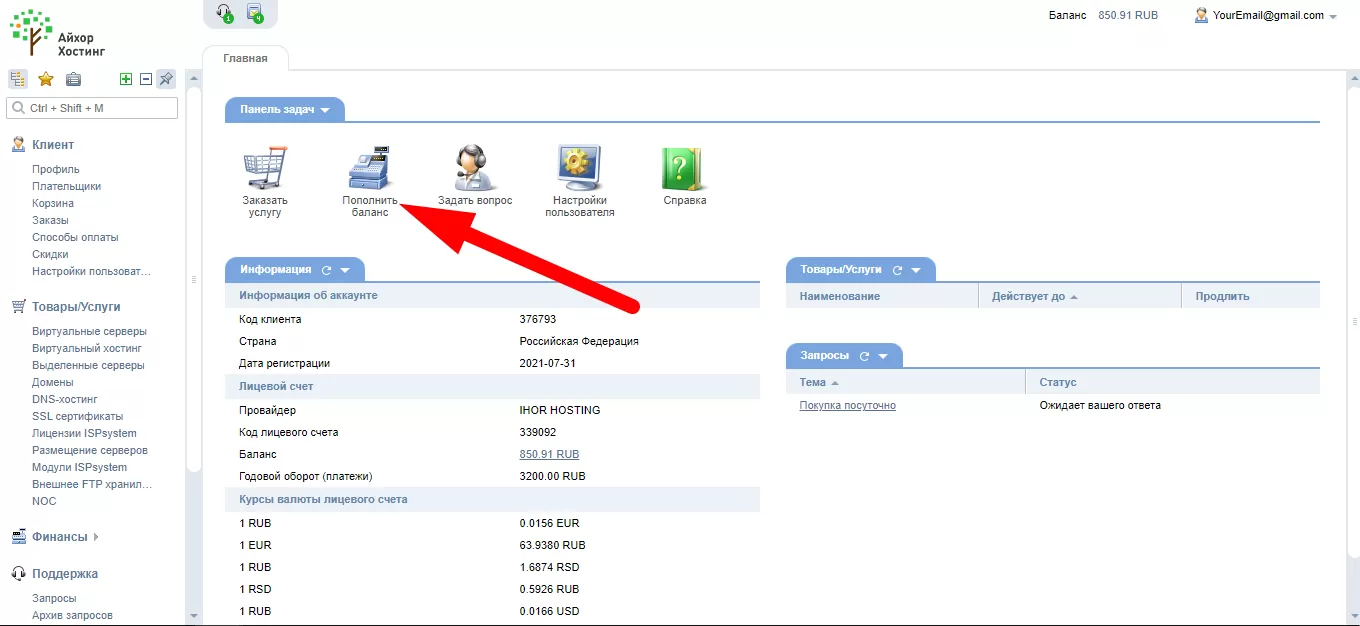
4) Create a new payer and click " Next "
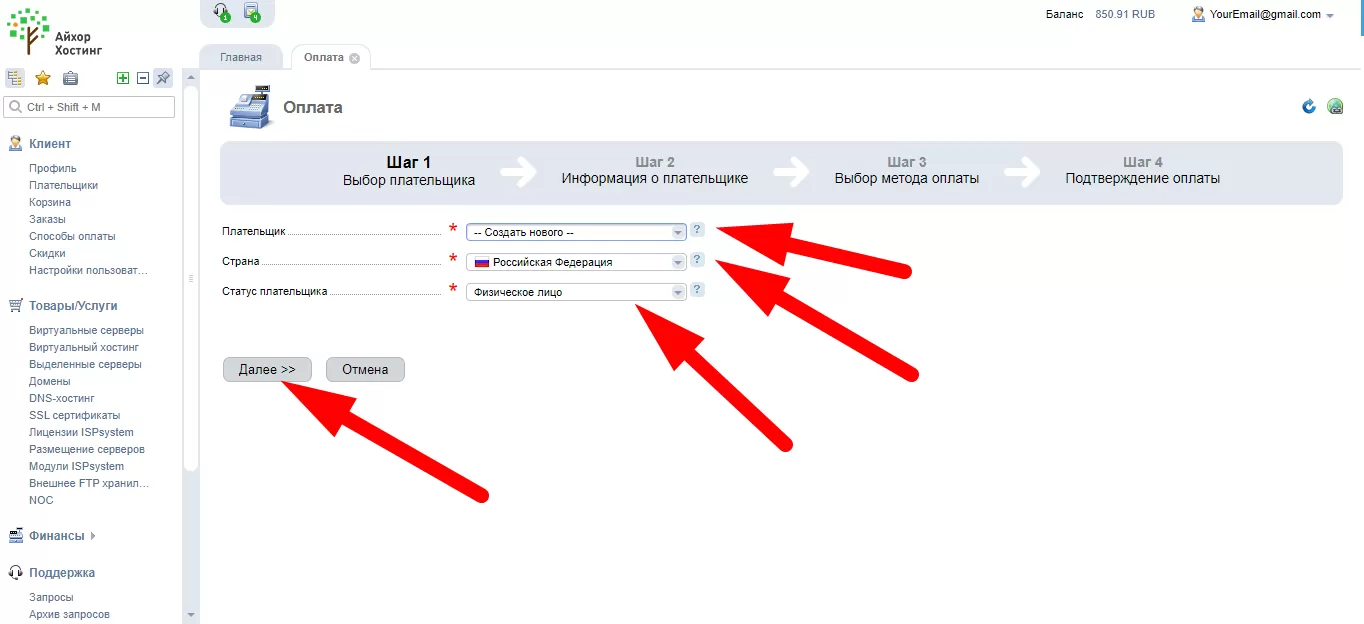
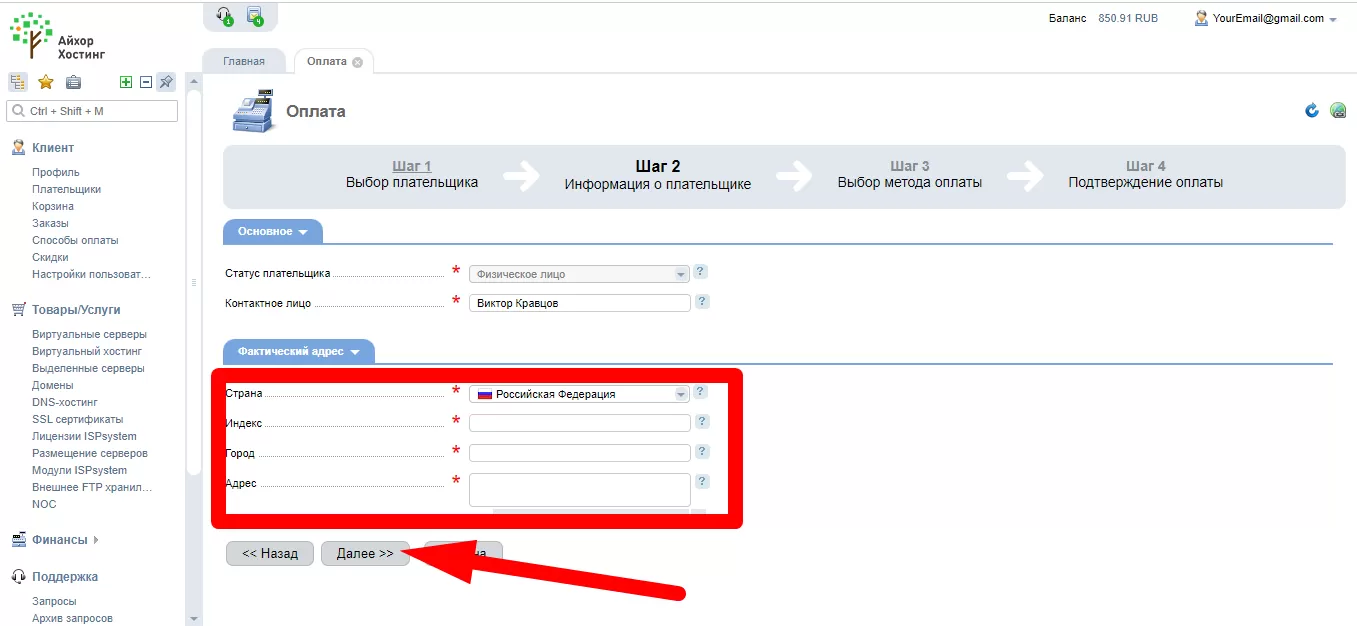
5) Choose a country, write down the index, city and address
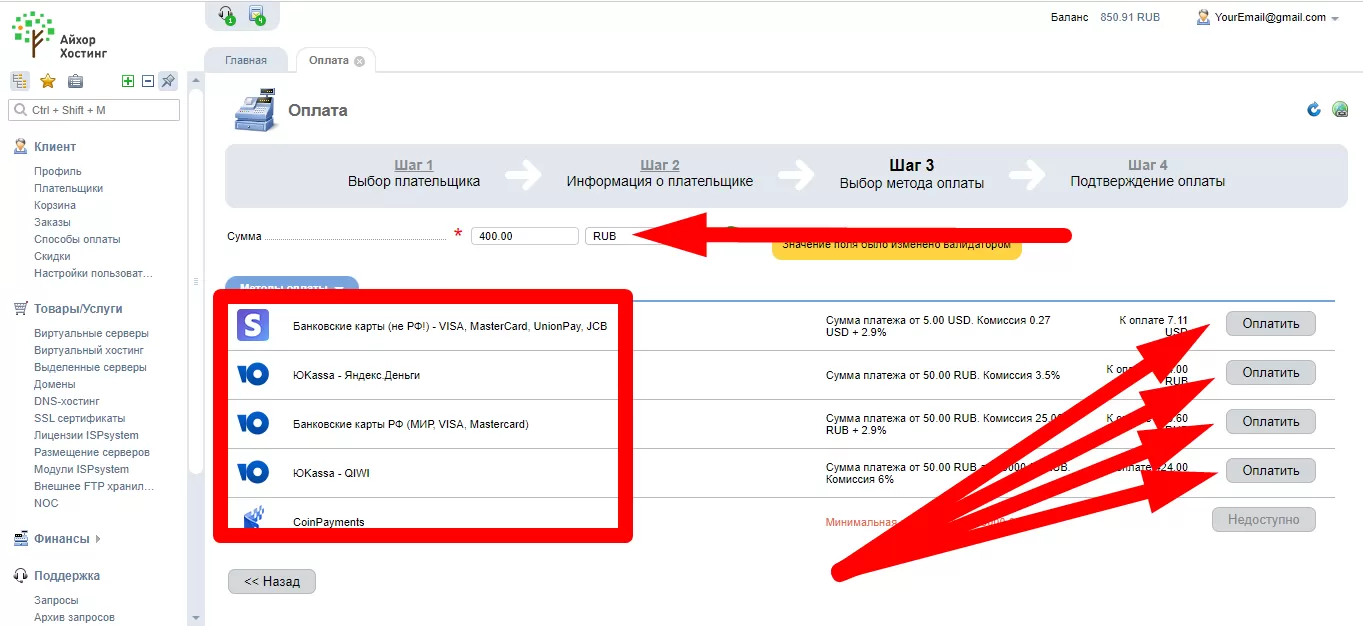
6) We write the amount: 400 (or more) and choose any payment method convenient for you
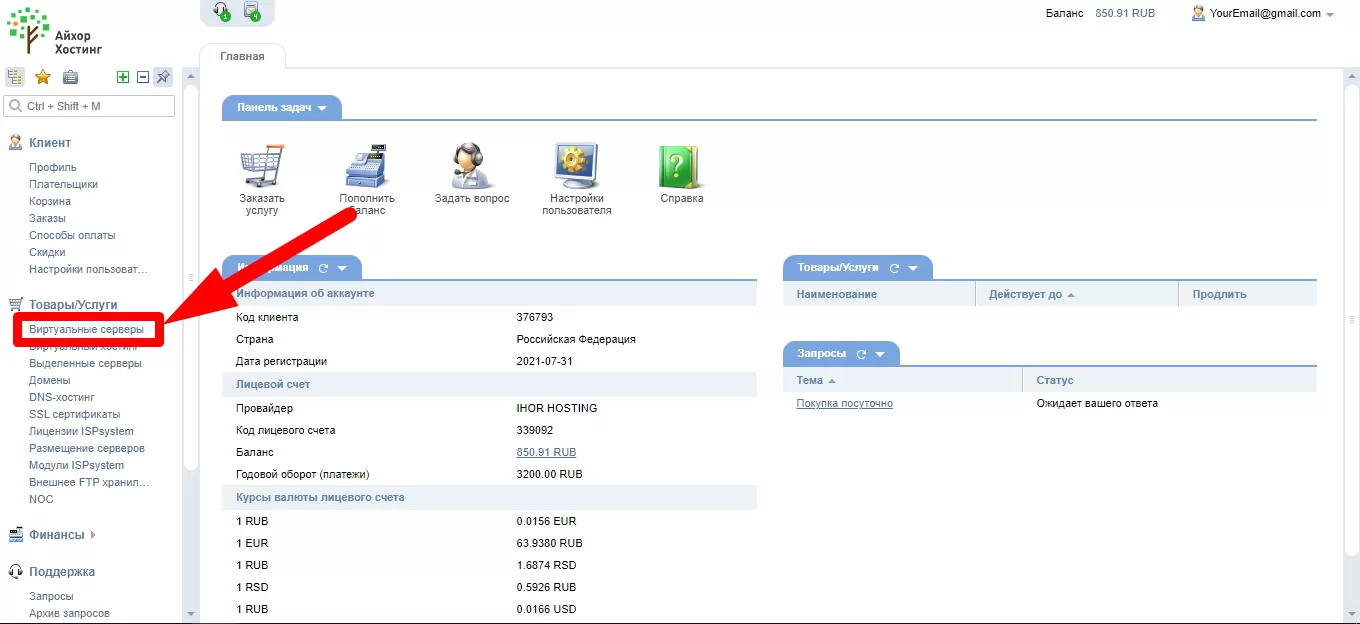
7) After successful payment, in the left menu, select " Virtual servers "
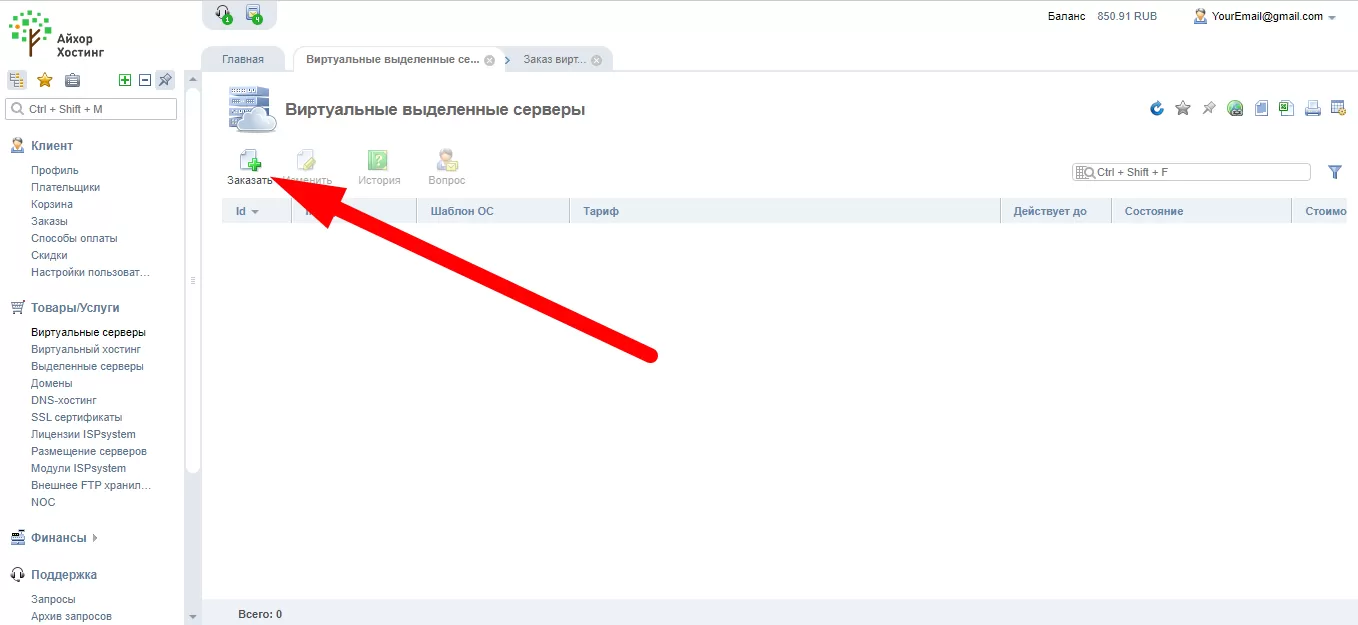
8) Click on the " Order " button
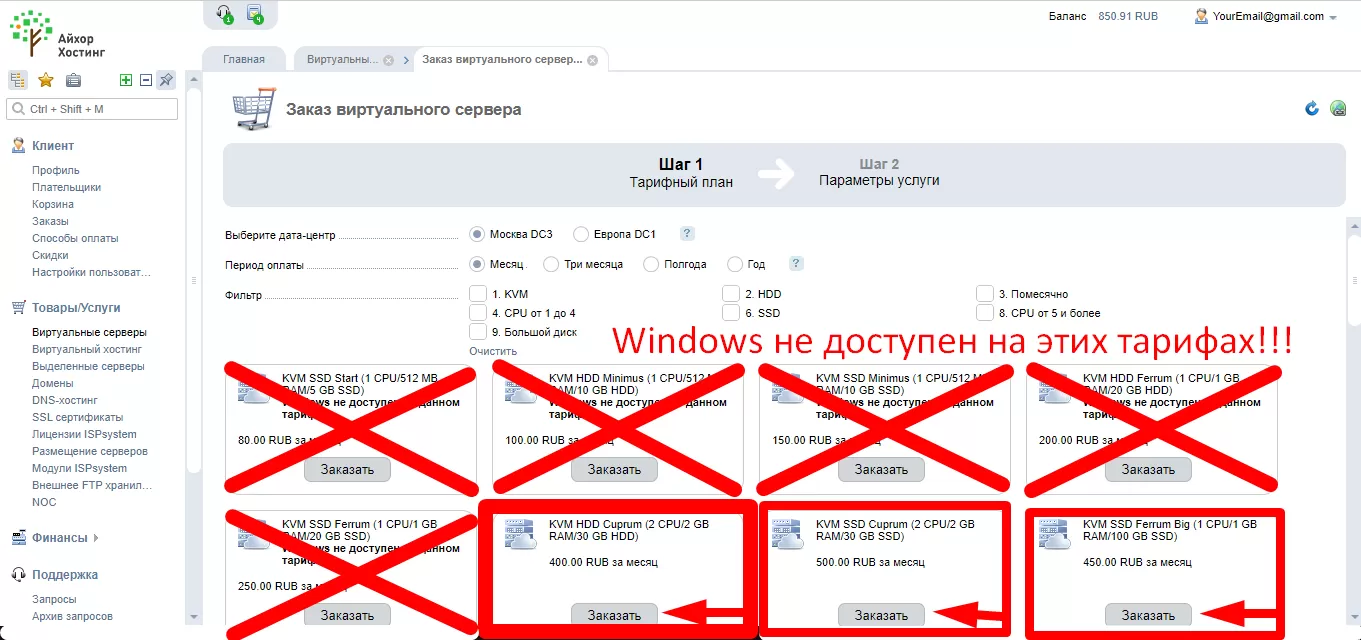
9) We select the server where there is no inscription " Windows is not available at this tariff " and click " Order "
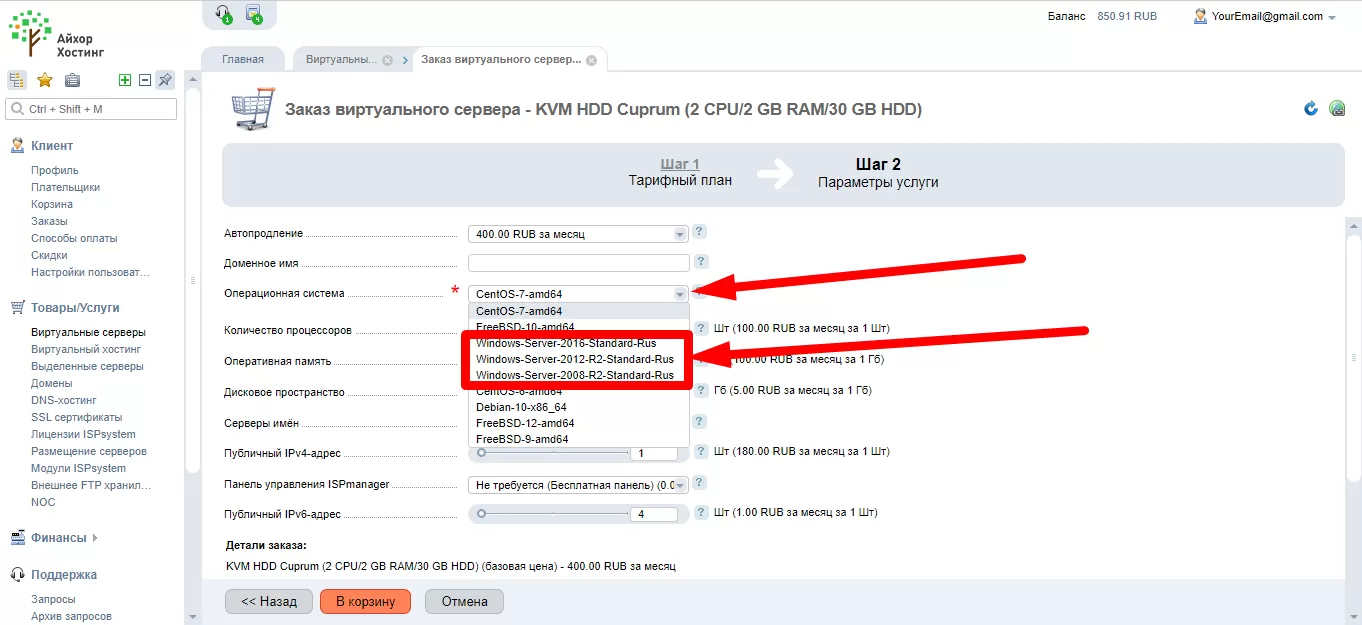
10) In the " Operating system " field, select the item " Windows-Server-2012-R2-Standart-Rus ".
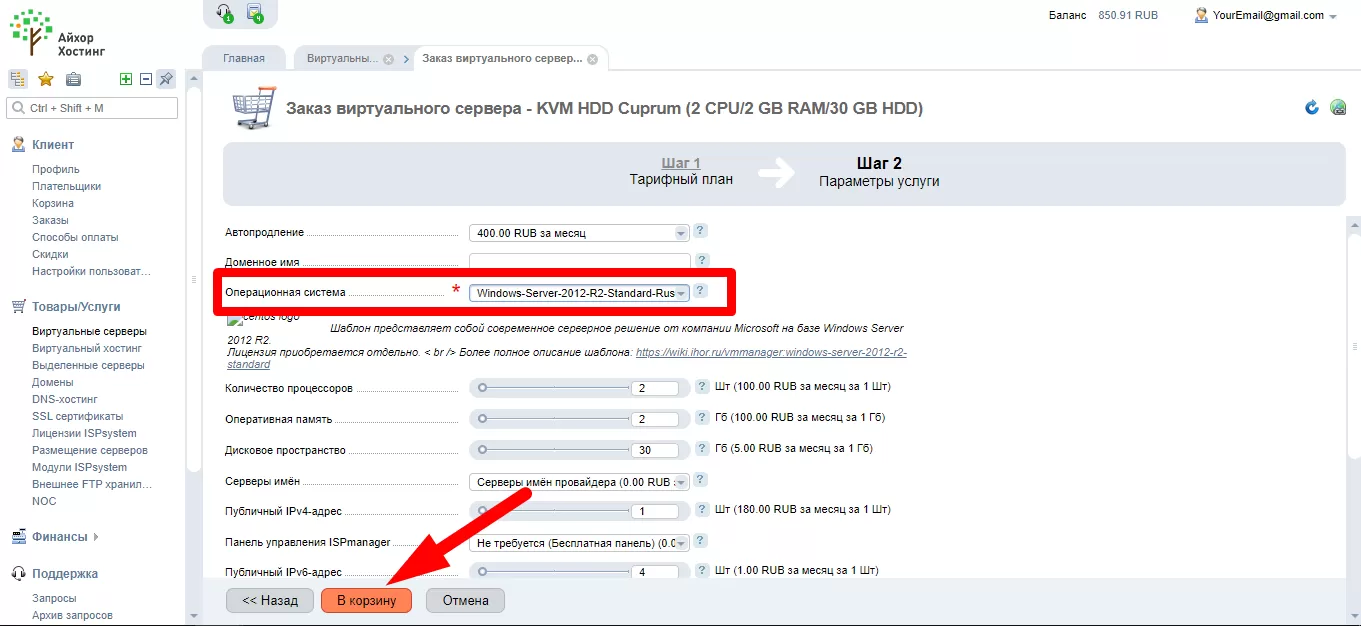
11) If desired, we can increase our server disk space, RAM or the number of processors. But for our purposes, everything standard will do!
12) Press the button " Add to cart "
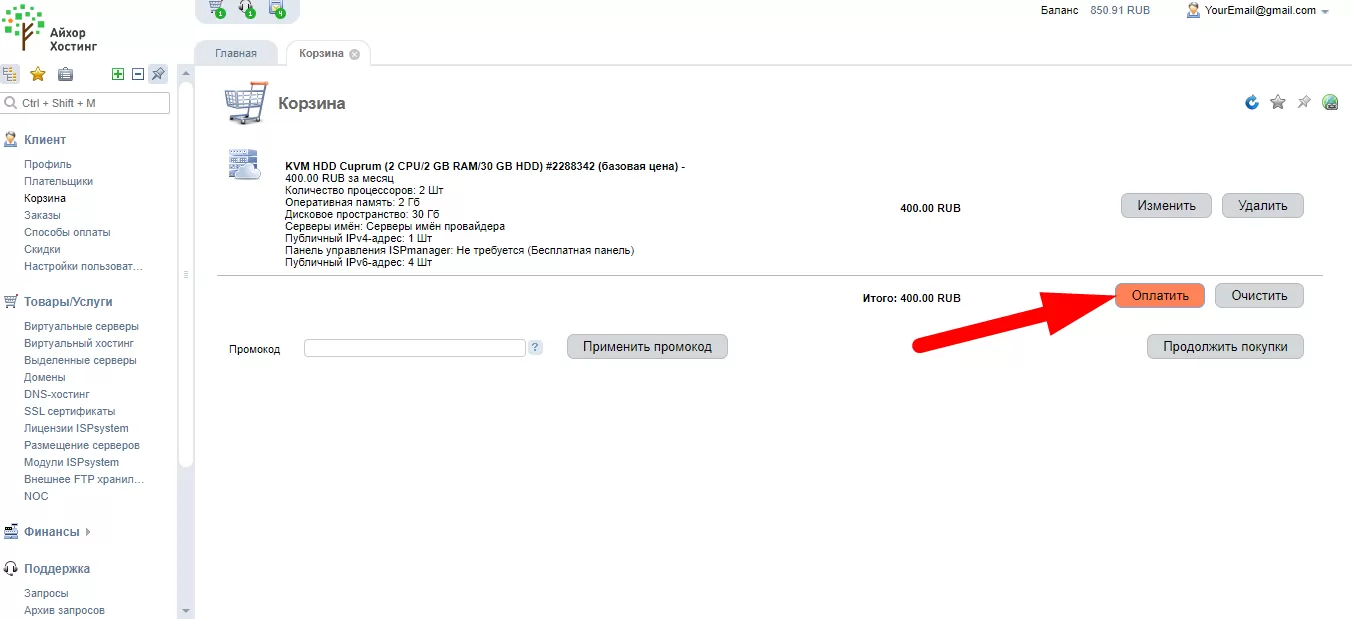
13) Press the button " Pay "
14) We select the payer, which we created at the very beginning. If you didn't do it, create it. After that, click on the " Next " button
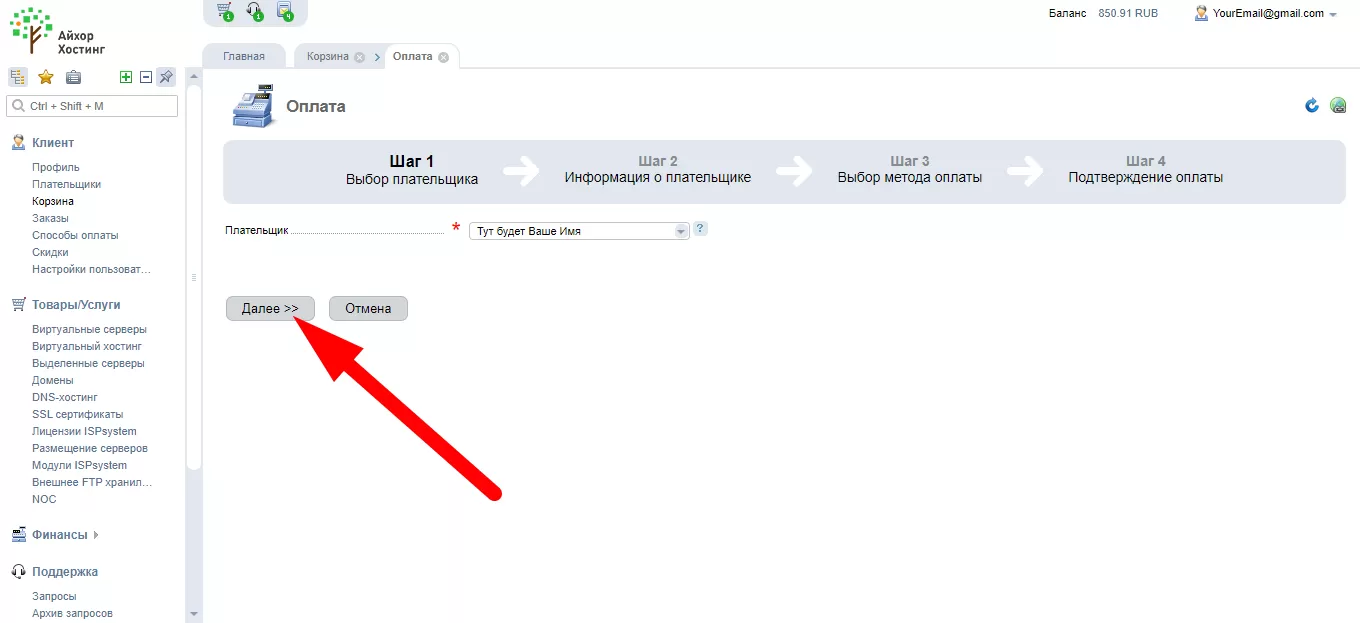
15) We will see our city, country and postcode that we entered earlier! If you are creating a new payer, then these data will need to be entered manually. After that, click on the " Next " button

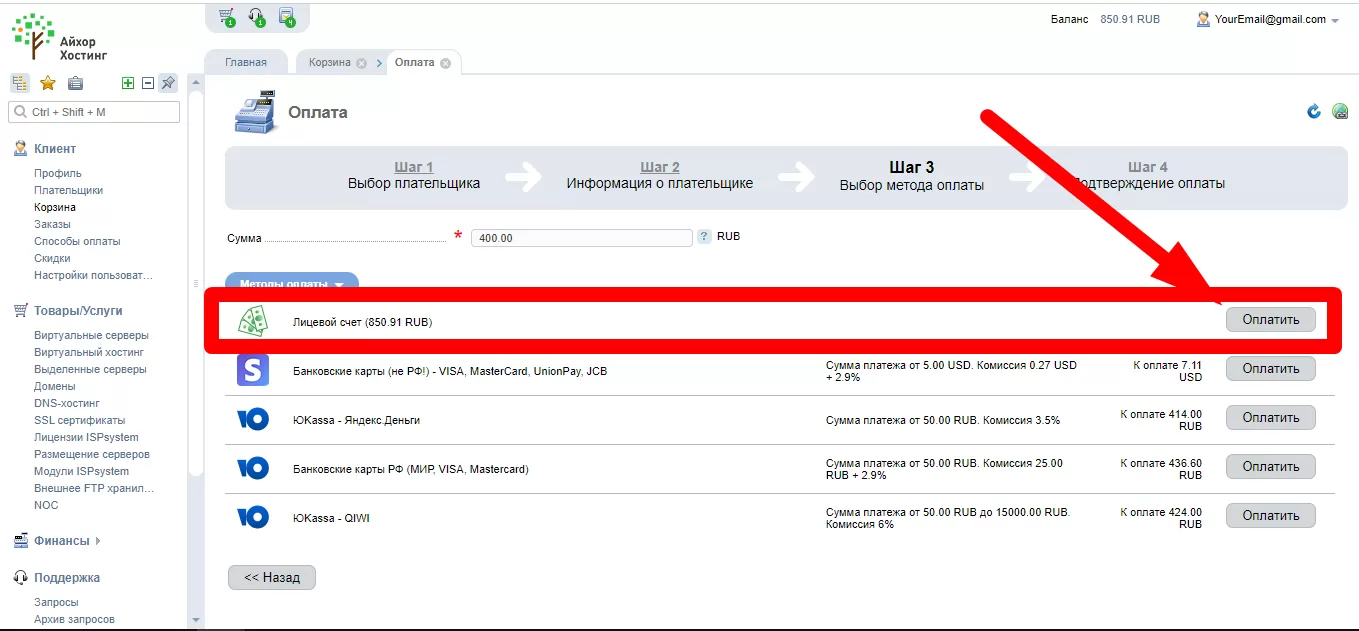
16) We choose payment from the personal account (If we replenished the account earlier), or from any payment method convenient for you!
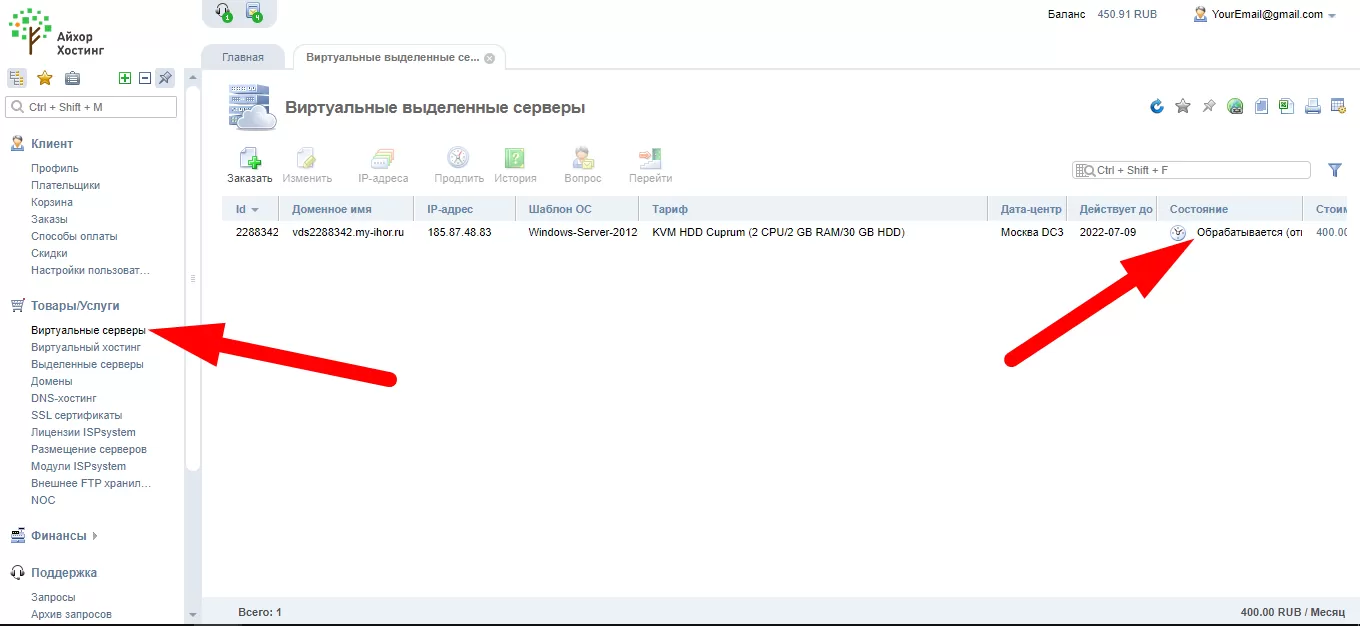
17) After successful payment, again click on the item " Virtual servers " in the left menu. We will see that we have added a new server.
But we can't use it yet, because it has the " Processing " statute.
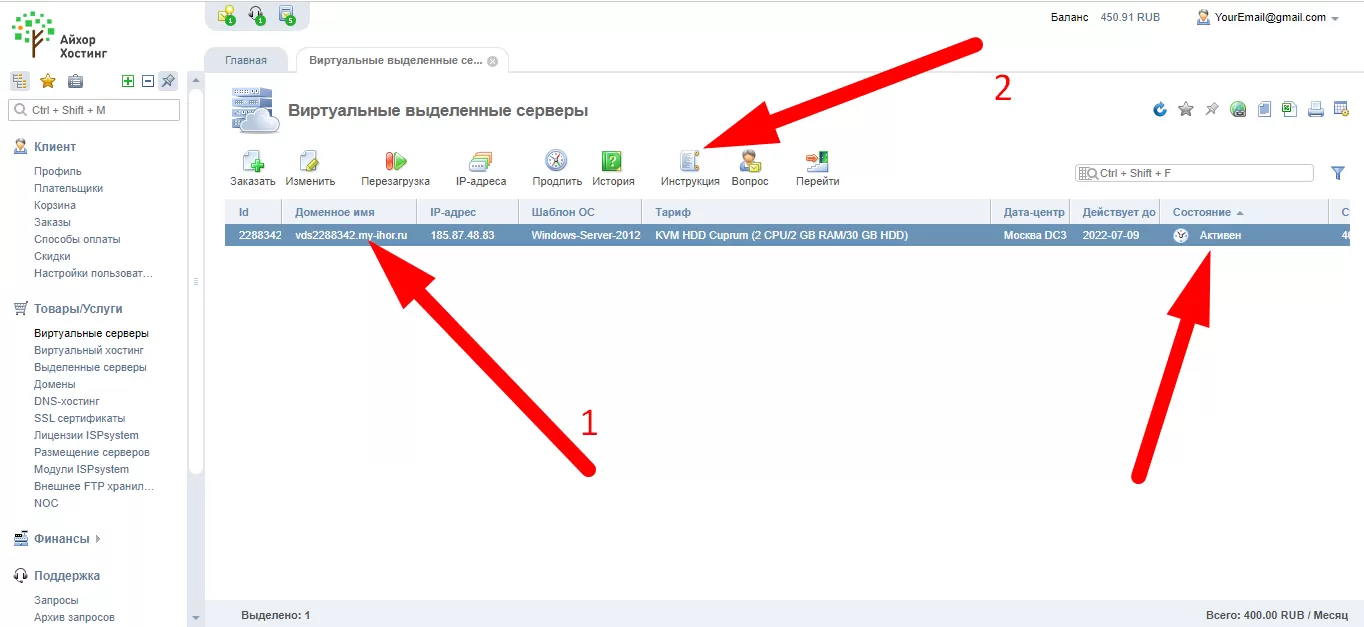
18) After waiting 10-20 minutes We will see the status " Active " (sometimes it will be updated after refreshing the page). After the status has changed to " Active ", you need to select our server in the list and click on the " Instructions " button. Also, this instruction will come to us on our e-mail
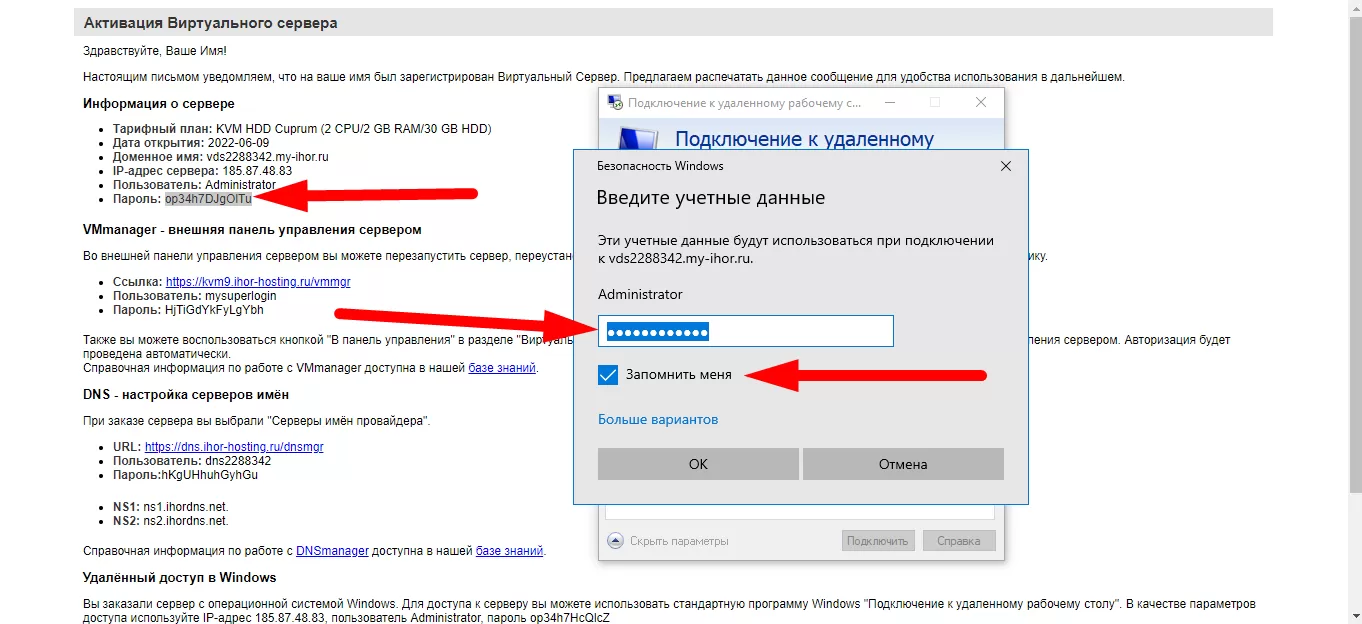
19) In this instruction, we will see 3 fields we need ( Domain name, User, Password ).
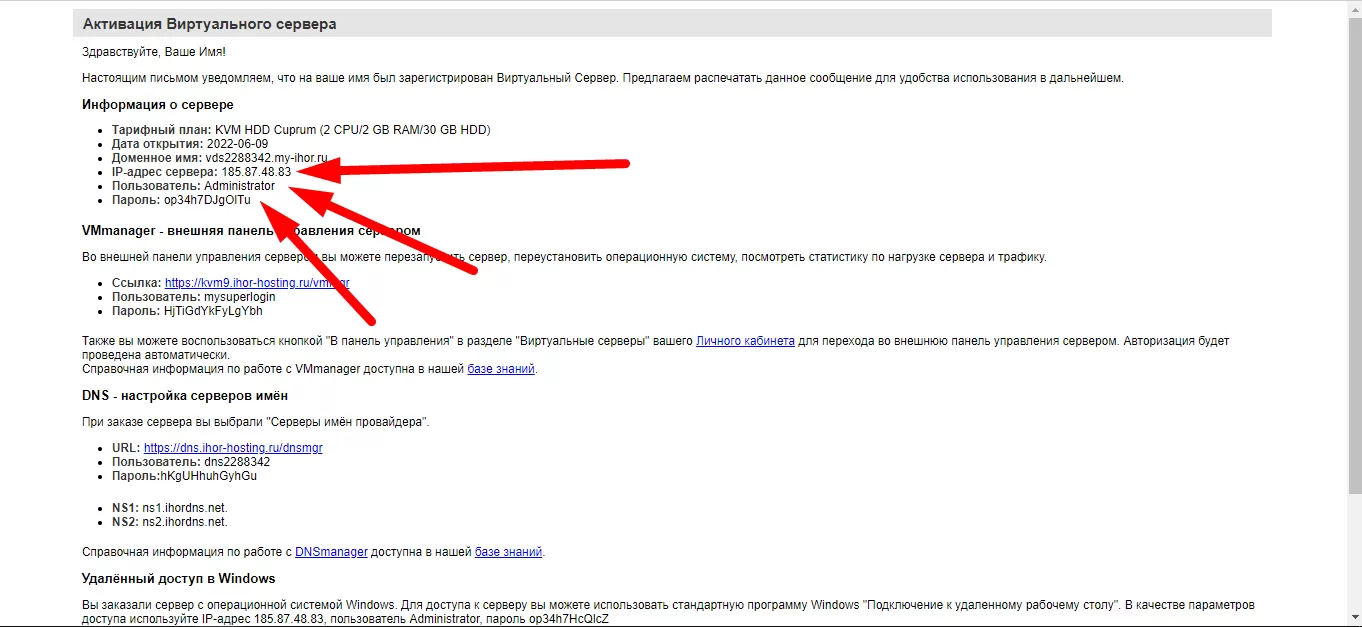
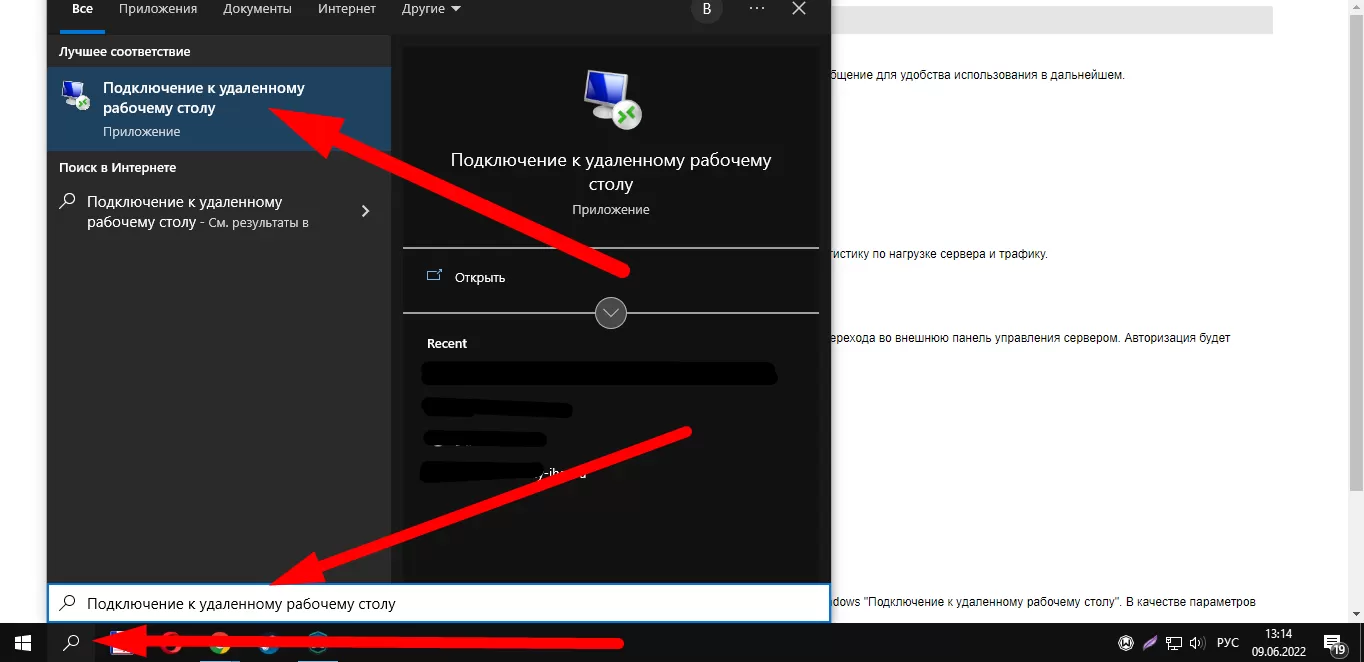
20) After that, near the " Start " menu, click on " Magnifying glass " and enter " Connected to Remote Desktop " in the search box and find the program we need to connect to the remote desktop
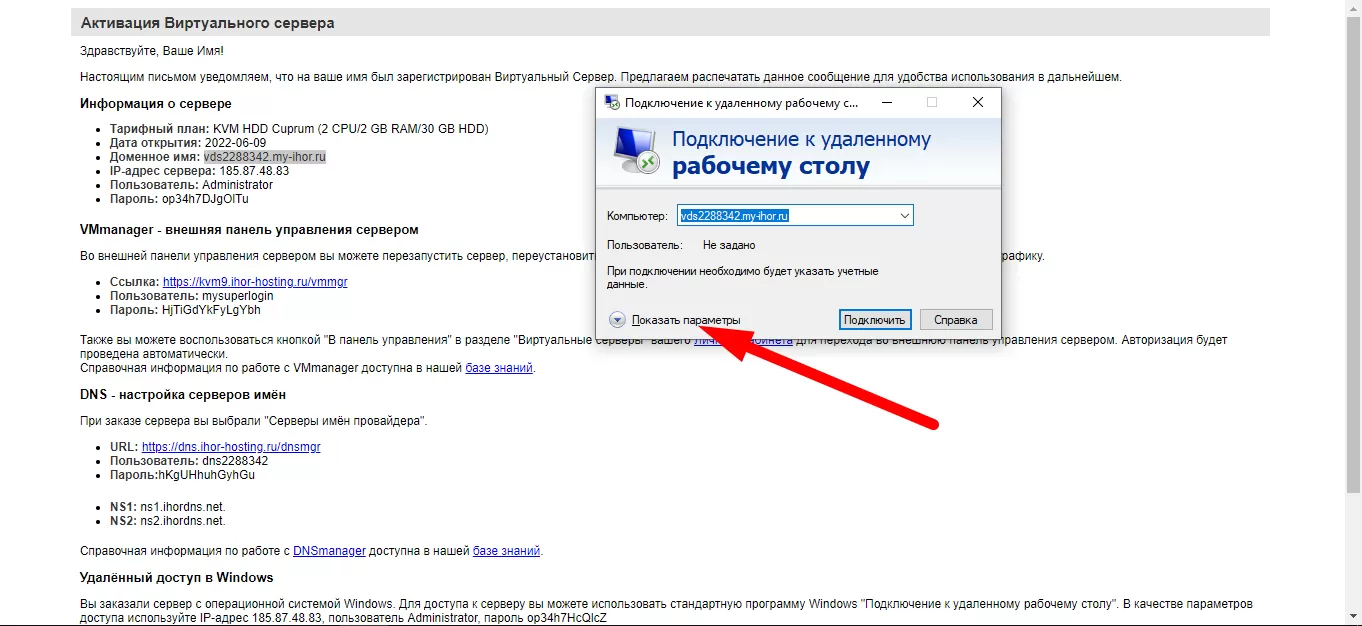
21) In the window that appears, click on " Show options "
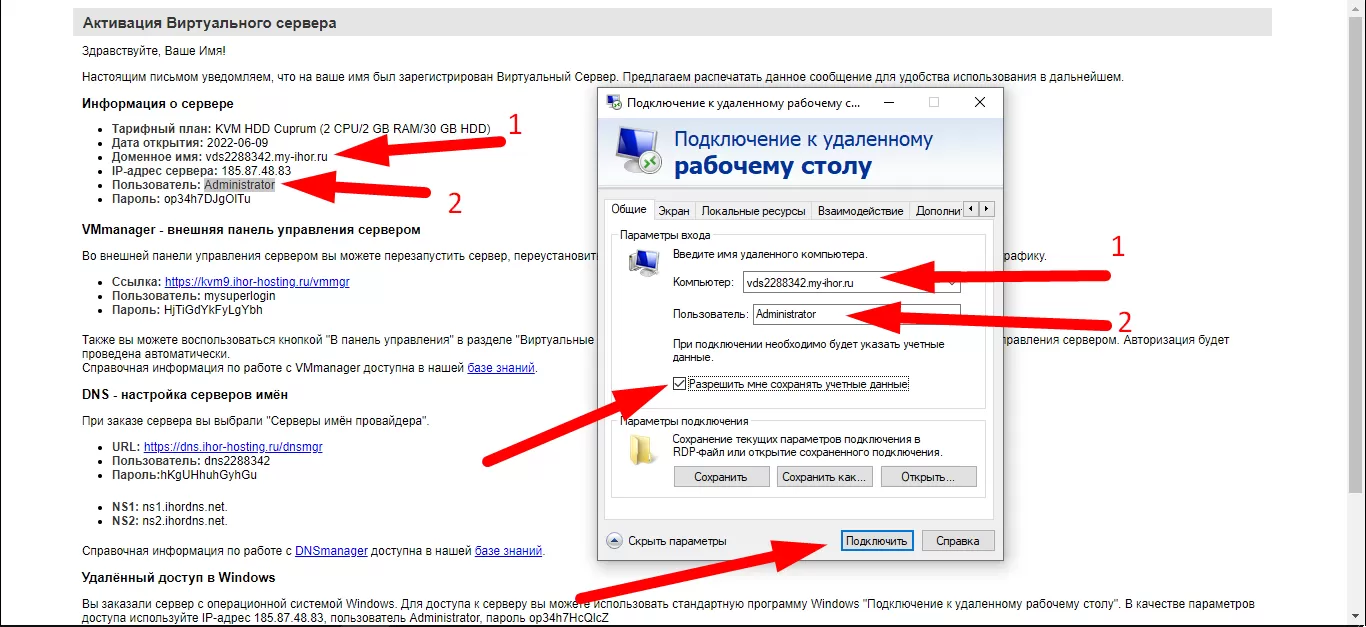
22) In the " Computer " field, enter the " Domain name " from the instructions, in the " User " field - the value from the " User " field of the instructions. After that, click on the "Connect" button
23) In the window that appears after this, enter the password from the " Password " field of the instructions and click " OK "
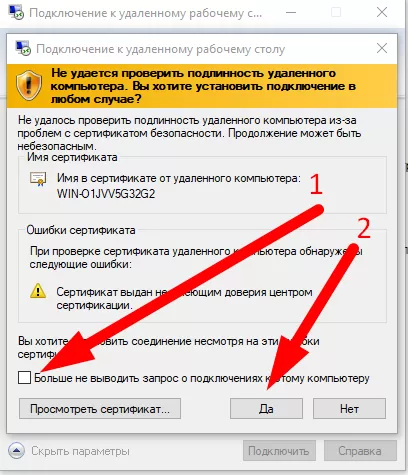
24) If you see a window with the text " Unable to authenticate the remote computer ... ", check the box " Don't prompt again ... " and click " Yes "
25) Finally, we saw the desktop of our new VDS server ! Now we can safely use it without loading our main computer! Also, if we turn off our computer, VDS will still work!
